Are you tired of the tedious and potentially damaging process of removing your gel or acrylic nails? Look no further!
In this comprehensive guide, we’ll walk you through the step-by-step process of soaking nails off safely and effectively.
Whether you’re a nail enthusiast or a professional nail technician, this article will provide you with all the tips and tricks you need to remove your nails without causing any harm.
Say goodbye to expensive salon visits and hello to hassle-free nail removal in the comfort of your own home!
Why Soaking Nails Off is Important
Before we delve into the specifics of soaking nails off, let’s understand why this method is crucial for the health of your nails.
Both gel and acrylic nails are durable and long-lasting, but removing them incorrectly can lead to damage, thinning, or weakening of the natural nail bed.
Soaking nails off is a gentle and effective technique that allows the nails to loosen and lift from the natural nail without excessive force or trauma.
By following the proper soaking process, you can preserve the health and integrity of your natural nails.
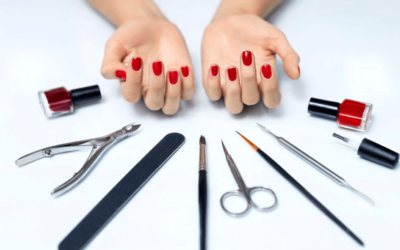
Tools and Materials You’ll Need
To successfully soak your nails off, gather the following tools and materials:
Acetone: Acetone is the key ingredient for removing gel and acrylic nails. It effectively breaks down the polymers in the products, making the removal process easier. Look for 100% pure acetone for the best results.
Nail file and buffer: A nail file and buffer are essential for preparing your nails before soaking and for removing any remaining product after soaking. Choose a fine-grit file and a buffer to avoid excessive damage to your nails.
Cotton balls or pads: Cotton balls or pads are used to saturate with acetone and wrap around your nails during the soaking process. They help hold the acetone in place and facilitate the removal of the nail products.
Aluminum foil: Aluminum foil is used to wrap around your nails and secure the soaked cotton balls or pads in place. It helps to create a barrier that prevents the acetone from evaporating too quickly.
Cuticle oil: After removing your nails, it’s essential to moisturize and nourish your nails and cuticles. Cuticle oil helps restore moisture and promote healthy nail growth.
Step-by-Step Guide to Soaking Nails Off
Follow these steps to safely and effectively soak your nails off:
Prepare Your Workspace: Find a well-ventilated area with good lighting to work on your nails. Protect your work surface with a towel or paper towels to catch any spills or drips.
File the Surface: Using a nail file, gently file the shiny top surface of your gel or acrylic nails. This step helps break the seal and allows the acetone to penetrate the products more effectively.
Cut and Prep the Foil: Cut ten small squares of aluminum foil, large enough to wrap around your nails. Prepare a stack of cotton balls or pads, one for each nail.
Soak the Cotton: Take a cotton ball or pad and saturate it with acetone. Ensure it’s thoroughly soaked but not dripping excessively.
Place the Cotton and Foil: Place the soaked cotton ball or pad on your nail, making sure it covers the entire nail surface. Wrap a piece of foil around the fingertip, securing the cotton in place. Repeat this process for all ten nails.
Wait and Relax: Allow the acetone-soaked cotton balls or pads to sit on your nails for approximately 15-20 minutes. Take this time to relax, read a book, or watch your favorite show.
Check and Remove: After the soaking period, gently remove one foil wrap from your finger. Apply slight pressure and twist the foil as you pull it off to encourage the gel or acrylic to lift.
Gently Remove the Product: Use a cuticle pusher or a wooden stick to gently scrape away the softened gel or acrylic. Be careful not to apply excessive pressure or force, as this can damage your natural nails.
Buff and File: Once the majority of the product has been removed, use a buffer to smooth out any remaining residue or unevenness. Then, lightly file the nails to remove any stubborn spots.
Moisturize and Nourish: After removing the nails, it’s essential to replenish moisture and nourishment. Apply cuticle oil to your nails and massage it in, focusing on the cuticles and the nail bed. This helps restore hydration and promotes healthy nail growth.
Tips for Safe Nail Removal and Aftercare
To ensure a smooth and safe nail removal process, consider the following tips:
Avoid Peeling or Picking: Resist the temptation to peel or pick at your gel or acrylic nails. This can cause damage to your natural nails and lead to nail thinning or weakening. Always opt for the soaking method for a gentle removal process.
Take Breaks: If you frequently wear gel or acrylic nails, it’s important to give your natural nails a break between applications. This allows them to breathe and recover from the previous nail enhancements.
Nourish and Protect: After removing your nails, apply a nourishing nail strengthener or treatment to promote healthy nail growth and protect your nails from potential damage.
Hydrate Your Cuticles: Regularly apply cuticle oil or moisturizer to your cuticles to keep them hydrated and prevent dryness and cracking. Healthy cuticles contribute to overall nail health.
Use Gloves: When engaging in household chores or activities that involve harsh chemicals or excessive water exposure, protect your nails by wearing gloves. This prevents damage and maintains the health of your natural nails.
By following these steps and tips, you can confidently and safely remove your gel or acrylic nails using the soaking method.
Enjoy the freedom of changing your nail styles or taking breaks between nail enhancements without compromising the health of your natural nails.
Remember, patience and gentle care are key when it comes to nail removal. Embrace the process, and let your natural nails shine in their healthy, beautiful state!
Related Articles
What Are the Nail Care Tools: A Comprehensive Guide
Sunflower Acrylic Nails: Nature’s Radiance on Your Fingertips
Sunset Nail Design: Artistry of Dusk on Your Fingertips
Taylor Swift’s Nails: A Fashionable Journey through Iconic Manicures

Teddy Bear Nails: Adorable Nail Art with Cuddly Charm
Tico Nails: Pura Vida Vibe with Costa Rican Nail Art
Toe Nail Designs with Flowers: Nature’s Beauty on Your Toes
Toe Nail Designs With Rhinestones: Sparkle and Glamor for Your Toes
Toe Nail Doctor: Expert Care for Healthy and Beautiful Toenails
Trendy Medium Length Square Acrylic Nails
Trippy Smiley Face Nails: Psychedelic Nail Art for a Colorful Journey
Tropical Beach Themed Nails: Paradise with Stunning Nail Art

Two-Tone Ombre Almond Nails: A Stylish Fusion of Nail Trend
Types of Nail Extensions: A Guide to Enhance Your Nail Beauty