Are you ready to embark on a journey through the glamorous world of finger waves short hair styles? This classic and iconic hairstyle has stood the test of time, gracing the heads of Hollywood’s elite and fashion-forward individuals alike.
In this comprehensive guide, we’ll dive deep into the intricacies of finger waves for short hair, providing you with step-by-step instructions, styling tips, and a glimpse into the history of this timeless trend. Let’s ride the waves of elegance and sophistication!
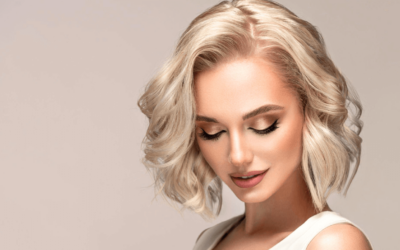
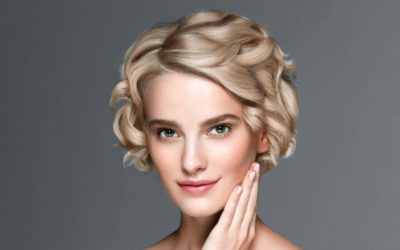
finger waves short hair styles
Finger waves are a true testament to the timelessness of fashion and style. This iconic hairstyle has graced the tresses of celebrities, flappers, and fashionistas throughout the decades.
Today, finger waves continue to make a statement, especially when adapted to short hair. The art of finger waving is a skill worth mastering, and this guide will equip you with the knowledge and techniques to do just that.
The Art of Finger Waving
Finger waving is a hairstyling technique that creates S-shaped waves in the hair. These waves are known for their elegance, precision, and vintage charm.
Whether you’re attending a glamorous event or simply want to infuse a touch of classic Hollywood into your daily life, finger waves are the perfect choice for short hair.
Key Aspects of Finger Waving
S-Shaped Waves: Finger waves create beautifully sculpted S-shaped waves that add sophistication to any hairstyle.
Classic Appeal: This technique has been popular since the 1920s, proving its enduring charm.
Versatility: Finger waves can be adapted to different hair lengths, including short hair, making them suitable for various occasions.
Artistic Expression: Mastering finger waving is like creating a work of art on your own hair.
Preparation and Tools for Perfect Finger Waves
Fine-Tooth Comb
Why it’s essential: A fine-tooth comb is your trusty companion for creating precise partings and smoothing the hair. The fine teeth allow for neat and defined waves, contributing to the overall polished look.
How to use it: Use the comb to create perfectly straight and even partings in your damp hair. This step is crucial to ensure that your waves are uniform and symmetrical.
Hair Clips
Why you need them: Hair clips are your organizational allies during the waving process. They help you section off your hair, ensuring that each part is properly waved without interference from other sections.
Pro tip: Use sturdy, non-slip hair clips to securely hold the hair in place. This prevents hair from falling out of the sections while you work on other areas.
Setting Lotion
The magic ingredient: Setting lotion is the secret to achieving long-lasting and beautifully defined finger waves. It not only helps your waves hold their shape but also ensures they remain intact throughout the day.
Application: Apply the setting lotion evenly to your slightly damp hair before you start creating the waves. Make sure it’s distributed from root to tip for consistent results.
Bobby Pins
Wave security: Bobby pins play a crucial role in securing your finger waves in place while they set. They prevent the waves from unraveling or losing their shape during the drying process.
Placement technique: After creating each wave, carefully insert bobby pins along the ridge of the wave to hold it in position. Be gentle to avoid disrupting the wave pattern.
Hair Dryer with Diffuser Attachment
Efficient drying: A hair dryer with a diffuser attachment is your time-saving tool. It accelerates the drying process, ensuring that your waves set faster and more effectively.
Proper use: Set your hair dryer to a low heat or cool setting, and use the diffuser to gently dry your waves. Avoid using high heat, as it can cause frizz and disrupt the wave pattern.
Strong-Hold Hairspray
Lock in the style: A strong-hold hairspray is your final defense against unruly waves. It keeps your finger waves in place all day, ensuring that your meticulously created style remains intact.
Application technique: Once you’ve completed your waves, give your entire hairstyle a generous spritz of hairspray. Hold the can at a distance to distribute the product evenly without weighing down your waves.
Styling Cream
The finishing touch: Styling cream is the cherry on top of your finger wave masterpiece. It adds a touch of shine, reduces frizz, and imparts a polished finish to your waves.
Usage tip: After removing the bobby pins and allowing your waves to set, take a small amount of styling cream and lightly smooth it over the waves with your fingertips. This step enhances the overall shine and refinement of your style.
With these essential tools and preparation steps, you’re well-equipped to embark on your finger wave journey with confidence. The precision and attention to detail at this stage will set the foundation for a stunning and enduring hairstyle that exudes timeless elegance.
Remember that practice makes perfect, and as you become more proficient in the art of finger waving, you’ll find that creating flawless waves becomes second nature. Enjoy the process and revel in the elegance of this iconic hairstyle.
Creating Finger Waves Step by Step
Achieving perfect finger waves requires practice and patience. Let’s break down the process step by step:
Step 1: Prepare the Hair
Start with clean, damp hair: Wash your hair and towel-dry it until it’s slightly damp, not soaking wet.
Apply setting lotion: Evenly distribute setting lotion throughout your hair for better wave formation.
Step 2: Section the Hair
Create partings: Use a fine-tooth comb to create horizontal partings in your hair, starting at the front and moving toward the back.
Clip sections: Secure each section with hair clips to keep them separate.
Step 3: Begin Waving
Start with the first section: Begin at the front and work your way back.
Use your fingers: Place your index and middle fingers together and press them onto the hair, creating an S-shaped ridge.
Pin the ridge: Use bobby pins to secure the ridge in place.
Repeat: Continue this process along each section, creating a series of waves.
Step 4: Set the Waves
Dry the waves: Use a diffuser attachment on a low heat setting to dry your waves. Be gentle to avoid disturbing the waves.
Let it set: Allow your waves to set for at least 20-30 minutes. This ensures that they hold their shape.
Step 5: Final Styling
Remove pins: Carefully remove the bobby pins and release the waves.
Apply styling cream: Run a small amount of styling cream through your fingers and lightly smooth it over the waves for added shine and hold.
Finish with hairspray: Lock your waves in place with a generous spritz of hairspray.
Achieving the perfect finger waves may take some practice, but the results are well worth the effort. Once you’ve mastered the technique, you’ll have a timeless hairstyle at your fingertips.
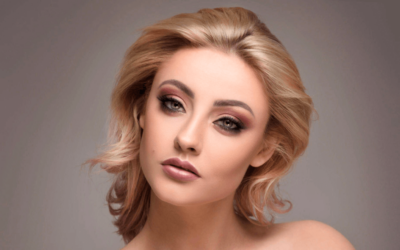
Styling Finger Waves Short Hair
Now that you’ve created your finger waves, it’s time to style them for different occasions. Here are some tips and tricks to help you achieve a flawless finish:
Daytime Elegance
Side Part: Create a deep side part for a classic daytime look. Pin one side behind your ear for an asymmetrical effect.
Vintage Accessories: Add a vintage touch with accessories like pearl pins or a silk scarf tied around your head.
Soft Waves: Use a light hold hairspray to maintain the softness of your waves for a sophisticated daytime appearance.
Evening Glamour
Sleek and Shiny: For an elegant evening look, apply a shine serum to your waves to make them glisten under the lights.
Low Bun: Gather your finger waves into a low bun or chignon for a glamorous updo that complements a formal outfit.
Statement Earrings: Pair your finger waves with statement earrings to draw attention to your glamorous hairstyle.
Casual Chic
Tousled Waves: Use your fingers to tousle your finger waves slightly for a more relaxed, casual appearance.
Headband: A decorative headband can add a touch of style to your casual look and keep your waves in place.
Textured Finish: Apply a texturizing spray to create a more modern, undone vibe with your waves.
No matter the occasion, finger waves for short hair can be adapted to suit your style. Experiment with different styling techniques to discover the versatility of this iconic hairstyle.
Variations and Inspiration
Finger waves may have a vintage origin, but they’re incredibly versatile and can be adapted to suit a range of tastes and preferences. Here are some variations and inspirational ideas to consider:
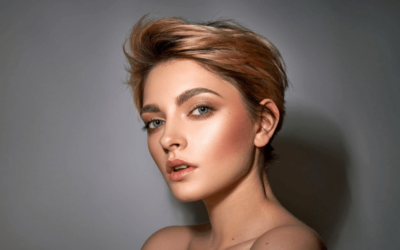
Finger Waves with Pixie Cut
Edgy Elegance: Combine the precision of finger waves with the boldness of a pixie cut for an edgy yet elegant look.
Tapered Sides: Create waves on the top and taper the sides for a modern twist on a classic style.
Accessorize: Use decorative pins or hair jewels to add a touch of glamour to your pixie cut waves.
Finger Waves with Bob
Retro Bob: Opt for a chin-length bob with finger waves for a classic retro appearance.
Side-Swept: Sweep your waves to one side for a more modern take on the bob with finger waves.
Layered Waves: Add layers to your bob for added texture and movement with your finger waves.
Finger Waves with Mohawk
Mohawk Glamour: Combine the daring Mohawk with finger waves for a unique and stylish look.
Textured Top: Create waves on the central section of the Mohawk while keeping the sides closely shaved for contrast.
Punk Accessories: Embrace the punk aesthetic by adding spikes or colorful hair accessories to your Mohawk waves.
The beauty of finger waves is their adaptability. Whether you have a short pixie cut, a bob, or even a daring Mohawk, finger waves can elevate your style to new heights, providing you with a timeless and sophisticated appearance.
History of Finger Waves
To truly appreciate the art of finger waves, let’s take a journey through its fascinating history:
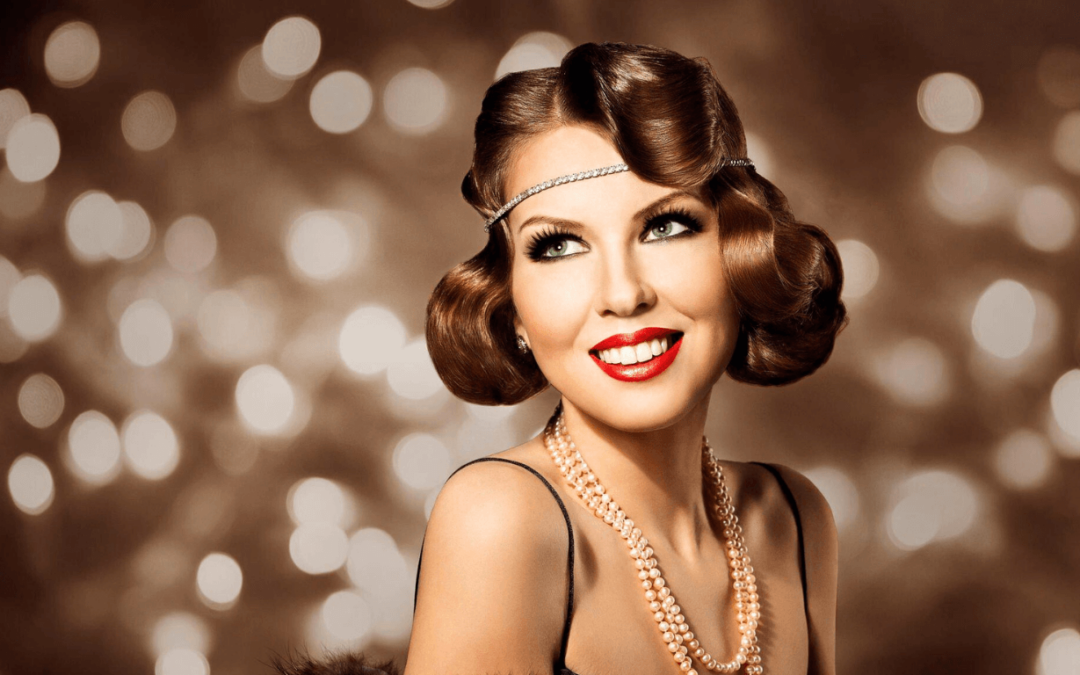
1920s – The Jazz Age: Finger waves made their debut in the 1920s during the Jazz Age, becoming a signature hairstyle of the flapper era.
This period was marked by newfound freedom and rebellion against traditional norms, and finger waves perfectly encapsulated the spirit of the times.
1930s – Hollywood Glamour: In the 1930s, finger waves continued to thrive, becoming synonymous with Hollywood glamour.
Actresses like Josephine Baker and Bette Davis popularized the style, cementing it as a symbol of elegance and sophistication.
1940s – War Era Elegance: Even during the war years of the 1940s, finger waves remained a popular choice. They were a symbol of timeless beauty and resilience during a challenging period in history.
1950s – The Post-War Revival: After World War II, finger waves experienced a revival as fashion embraced opulence and glamour. Iconic stars like Marilyn Monroe and Audrey Hepburn contributed to the hairstyle’s enduring appeal.
1980s – A Modern Twist: The 1980s brought a resurgence of finger waves with a modern twist. The waves were often accompanied by bold makeup and statement fashion choices.
Present Day – Timeless Elegance: Finger waves continue to be a timeless choice for those who appreciate classic beauty. Today, they’re adapted to suit contemporary tastes, making them a versatile hairstyle for all occasions.
Maintaining Finger Waves
To ensure your finger waves remain pristine and long-lasting, here are some maintenance tips:
Nighttime Care: Use a satin or silk pillowcase to reduce friction and prevent your waves from getting flattened while you sleep.
Touch-Ups: On the following days, you can refresh your waves by lightly dampening them with a spray bottle and using your fingers to reshape them.
Hairspray: Keep a small travel-size hairspray with you for quick touch-ups throughout the day to maintain the shape and hold of your waves.
Regular Trims: Short hair, especially with finger waves, benefits from regular trims to maintain the style’s precision.
Protective Styling: Consider wearing a scarf or headband when exposed to windy or humid conditions to protect your waves.
Conclusion
In the world of hairstyling, few techniques are as iconic and timeless as finger waves. This classic hairstyle has transcended eras and fashion trends, remaining a symbol of elegance and sophistication.
Whether you choose to embrace the vintage allure or give it a modern twist, finger waves for short hair offer a touch of timeless elegance that is sure to turn heads and make a statement.
As you embark on your finger wave journey, remember that practice makes perfect. With dedication and a keen eye for detail, you’ll master the art of finger waving, unlocking a world of hairstyling possibilities that will leave you feeling confident, elegant, and utterly chic.
Related Articles
Short Hairstyles for Round Faces: Flaunt Your Best Features with Confidence
Short Hair Styles for Thick Hair: Embrace Your Volume and Style
Short Hair Styles for Prom: Effortlessly Chic and Stylish Looks

Short Hairstyles for Men: A Guide to Stylish Black Haircuts

Short Hairstyles for Thin Hair Over 50: Embrace Your Fabulous Look
Short Hair Style for Wedding: The Elegance Redefined

Short Hairstyles for Women Over 60: Elegance and Confidence

Short Hair Styles for Older Women: Embrace Elegance and Confidence

Short Hair Styles for Curly Hair: Embrace Your Natural Beauty
The Ultimate Guide to Short Hair Styles for Wavy Hair

Short Hair Styles for Long Face: Flattering Your Unique Features
Short Hairstyles for Women: Embrace Effortless Elegance

Faith Hill Short Hair Style: Timeless Elegance and Iconic Inspiration

Effortless Chic: Casual Outfits for Short Hair Styles